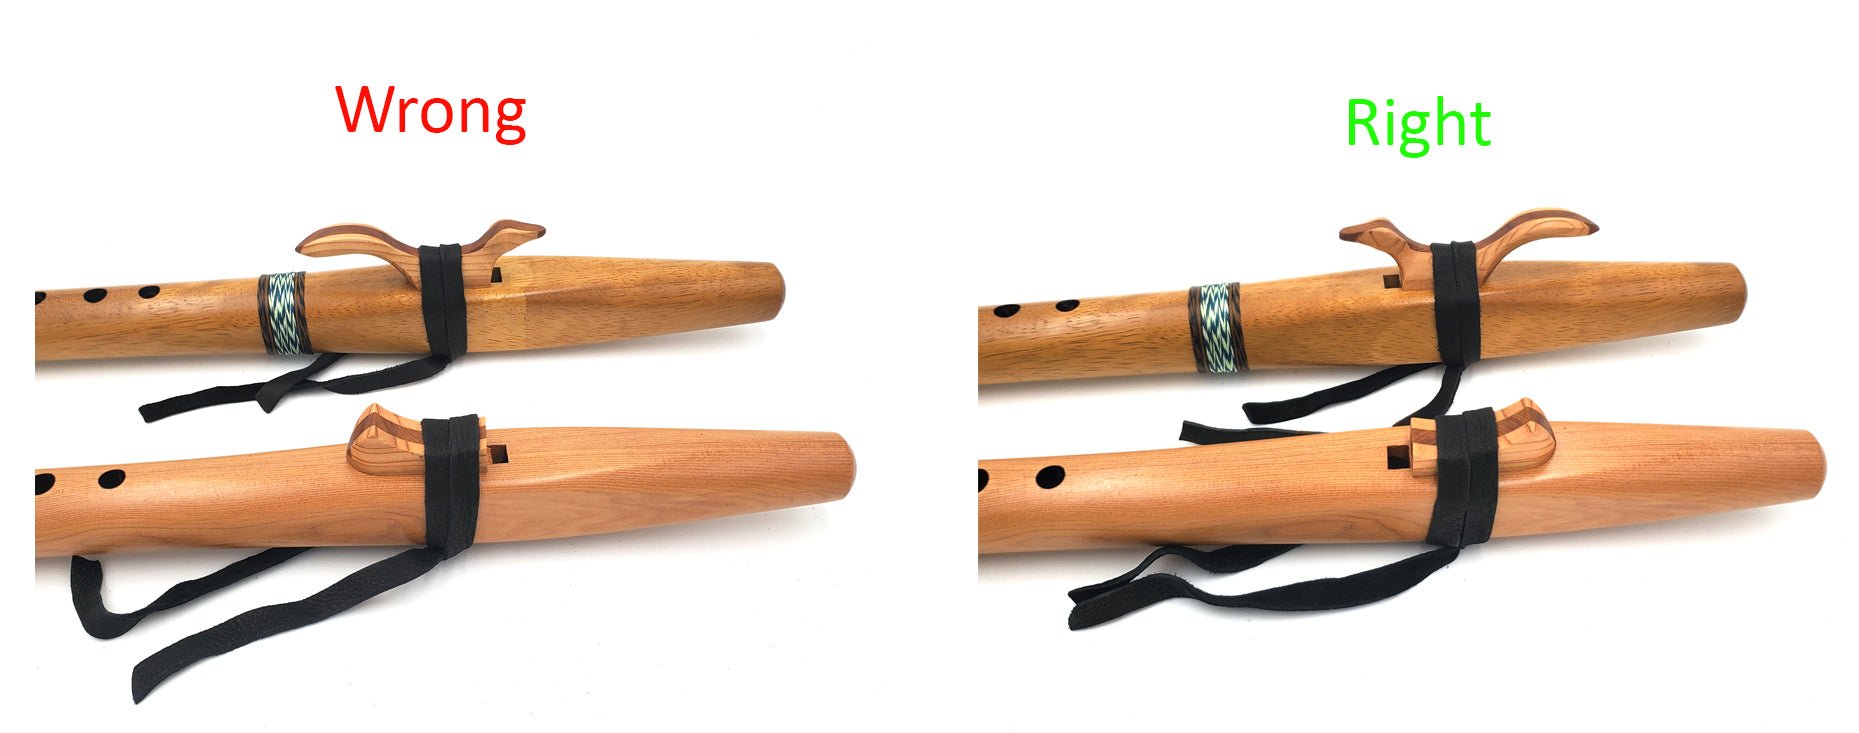
How To Put On Your Flute Block

What Is The Block and What Is It's Purpose?
The "block" is the piece on your flute that is held on by a leather strap. It's function is to channel a very precise amount of air from the slow air chamber that you blow into up and across the sound hole on your flute. Proper block placement is one of the most important parts of successfully playing your flute and one of the first places to look when something doesn't sound right.
Why Is The Block Removable?
The block needs to be removable because moisture from your breath will form underneath it as you play and it should be removed after each playing to allow the flute to dry out inside. For this reason, it is important that you do not double knot your leather which will make it hard to untie.
How To Put On Your Block
Step One - Look at the bottom of your block to see which way the groove is facing. The open end of the groove should point at the fingering holes, otherwise it will blow air back in your face and your flute wont play!


Step Two - Hold the block in position with one hand and use the other hand to wrap your leather twice or three times over the block.
Tip: hold the end of the flute beneath your arm or between your legs to free up both hands.

Step Three: Pinch the tales of the leather beneath the flute and give a gentle tug to tighten them.

Step Four: Tie the leather once so you can still pull on the tails to tighten it. Do not knot the leather or it will be difficult to remove.


Step Five -Slide the block forward or backwards so the square edge of it lines up with the back edge of the fipple hole closest to the fingering holes. One square hole will be completely underneath the block and one will be completely visible. 
You have successfully tied your flute block on! Hooray!
Quick links
Search
Newsletter Sign-up
Contact Us
Shipping
Returns And Refund Policy
Terms of Service
Privacy Policy
